
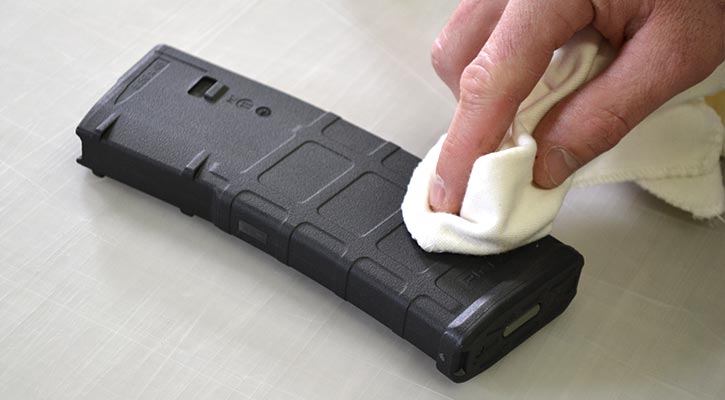
Step 1: Clean the Surface
The key to a successful installation starts with surface prep. It is absolutely necessary to remove all gun oil and grease in order for the vinyl to adhere properly. We recommend using a gun specific degreaser, something stronger than mere rubbing alcohol. Use a small brush or towel to scrub into the recessed areas where build up can occur.
Even new magazines should be cleaned. It's common practice to lubricate factory fresh hardware for preservation purposes, and this will impede the vinyl from sticking well. Ensure the surface is completely dry before moving on to the next step.
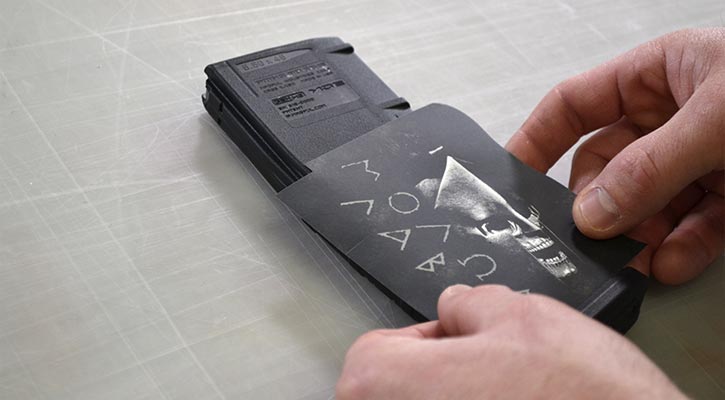
Step 2: Peel and Stick
The Mag Skins come with two pieces, the left and right. Install the left mag skin first, as marked on the template. Use the lip on the base of the mag as a guide for the skin, centering it right in the middle. Additionally, use the notch cut out on the inside portion of the piece to line up along the edge of the front face of the magazine.
Use your fingers to press into place. If you don't like where it's sitting, simply take it off and place it again. Doing this over and over does not reduce the adhesion as the final bonding occurs during the heating process. Install the right piece and overlap along the front and back edges.
Step 3: Heat and Press
Use a heat gun or blow dryer to warm the vinyl. Doing so will cause it to become malleable. The vinyl can stretch into the recessed edges and around the corners, hugging every little detail and crevice for the finished look. Work out wrinkles with your fingers, or peel up and try again. If you find any air bubbles, poke them with the tip of a sharp hobby knife and press down with your fingers to let the air escape and seal up.
Continue heating the mag on all sides, working the material with your fingers to press in along the detailed areas. Using a hand squeegee or credit card is useful for pressing the vinyl along the edges of the ribs, conforming to the shape of the magazine like a skin, not just a glove. The final heating process is what activates the bonding agent and seals the deal. Once cooled down, the magazine is ready for use!


